

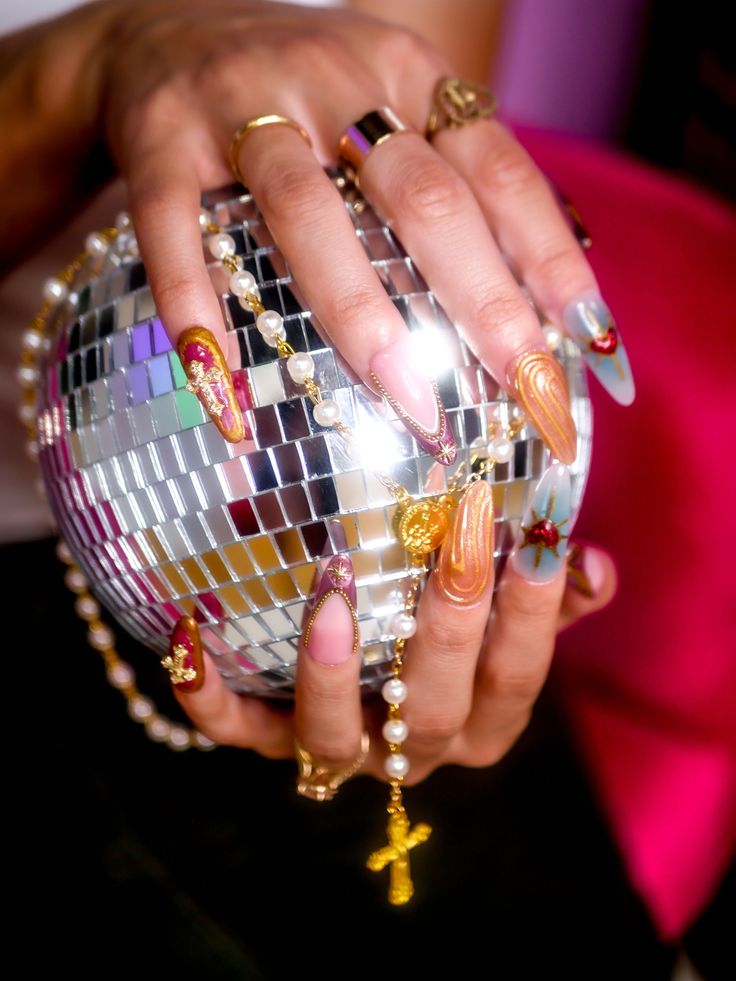
The Secret to a Perfect Application
If you are looking for the absolute core truth on this topic, here it is: a successful application is 90% preparation and 10% execution. To put it simply, the correct way to apply artificial nails is to start with a meticulously clean, dehydrated, and gently buffed natural nail bed. When applying the nail, you must press it down at a 45-degree angle starting from the cuticle base and hold it firmly for at least 30 seconds. This specific angle prevents trapped air, which is the number one culprit behind nails popping off prematurely. Proper preparation and this specific pressing technique are the undeniable foundations of a long-lasting manicure.
Why Mastering This Skill is a Game-Changer
You might wonder why you should invest the time to learn the intricacies of how to apply press on nails. The reasons for doing so extend far beyond mere aesthetic considerations; it is about taking control of your schedule, your financial resources, and your nail health. First and foremost is the incredible cost and time efficiency. Traditional acrylic or hard gel extensions at a reputable salon can easily cost upwards of $80 to $150, not including the mandatory tip. When you consider the daily commute, waiting times and the two hours spent in the chair, it is clear that this is a significant portion of your day and paycheck. By acquiring this skill, you will be able to achieve the same aesthetic result in 15 to 20 minutes, from the comfort of your own home.
Secondly, it is crucial to acknowledge the significance of nail health. The continuous use of acrylics, drills and harsh chemical removers can cause significant damage to natural nail plates, leaving them brittle and painful. When applied and removed correctly, high-quality press-ons act as a protective shield for your natural nails, allowing them to grow out safely underneath.
Lastly, understanding this process grants you unparalleled versatility. You can switch from a short, neutral almond shape for the office on Friday to a long, dramatic stiletto with rhinestones for a weekend party. Once you conquer the learning curve of how to apply press on nails, you unlock a world of endless, damage-free, and affordable self-expression.
Step-by-Step Guide: The Detailed Process
To achieve that flawless, bulletproof manicure, you need to treat the process like a professional nail technician would. Follow these detailed steps meticulously.
Step 1: Finding the Perfect Fit (Sizing)
-
What you need to do: Before opening any glue, take out the nails from your set and measure them against your natural nails. The artificial nail should fit perfectly from sidewall to sidewall without overlapping onto your skin. If you are between two sizes, always choose the slightly smaller size, or gently file the edges of the larger size to fit.
-
The Reason: If the nail is too big and rests on your skin or cuticle, the natural oils from your skin will break down the glue instantly, causing premature lifting. If it’s too small, it will pinch your natural nail, causing discomfort and uneven tension that eventually forces the nail to pop off.
Step 2: Cuticle Preparation
-
What you need to do: Soak your hands in warm water for a few minutes to soften the skin. Using a wooden or stainless-steel cuticle pusher, very gently push back your cuticles to reveal the maximum surface area of your nail bed. Carefully trim away any white, dead, flaky skin on the nail plate using cuticle nippers.
-
The Reason: Glue and adhesive tabs are designed to bond securely to keratin (your nail plate), not to skin. Even a microscopic layer of invisible dead skin at the base of your nail will create a barrier, preventing the adhesive from forming a tight seal. This leads to snagging hair and eventual lifting.
Step 3: Buffing the Surface
-
What you need to do: Take a soft grit buffer block and lightly buff the entire surface of your natural nail. Your goal is simply to remove the natural glossy shine, paying special attention to the edges and the cuticle area. Do not over-file or thin out your natural nail.
-
The Reason: A smooth, shiny surface gives the adhesive nothing to grip onto. By lightly buffing the nail, you are creating micro-abrasions and a rough texture. This allows the liquid glue to seep into these tiny grooves, creating a mechanical bond that is exponentially stronger than sticking a smooth surface to another smooth surface.
Step 4: Dehydrating and Cleansing
-
What you need to do: Saturate a lint-free wipe with at least 70% isopropyl alcohol or a specialized nail dehydrator. Wipe down every single nail thoroughly, scrubbing away all the dust created from buffing. Let them air dry completely (which takes about 5 seconds). Do not touch your face, hair, or phone after this step!
-
The Reason: Natural sebum (oil) and dust are the arch-enemies of adhesives. This is perhaps the most crucial preparatory step when learning how to apply press on nails. The alcohol strips away all moisture and oils, leaving a bone-dry canvas that ensures maximum adhesion.
Step 5: The Application Technique
-
What you need to do: If using liquid glue, apply a small dot to the center of your natural nail and a small dot to the back of the artificial nail. If using sticky tabs, apply the tab to your natural nail, pressing out any air.
-
The Reason: Applying adhesive to both surfaces ensures there are no dry spots. This double-application method creates a strong, unified layer of adhesive that binds the two surfaces together seamlessly.
Step 6: The 45-Degree Angle Press
-
What you need to do: Align the bottom edge of the artificial nail slightly underneath your pushed-back cuticle at a downward 45-degree angle. Slowly act as a hinge, lowering the nail onto your natural nail bed. Press down firmly in the center, and then pinch the sides. Hold this pressure firmly and consistently for 30 to 45 seconds.
-
The Reason: Applying at a 45-degree angle and rolling the nail downward pushes all the air forward and out the tip. If you just slap the nail down flat, you will trap microscopic air bubbles. Air bubbles expand and contract with temperature changes and allow water to seep in, which breaks down the glue and creates a breeding ground for bacteria. The 30-second hold gives the glue the exact time it needs to cure and lock into place.
Professional Advice & The Jolifeu Difference
Now that you understand the mechanics of the application, it is time to talk about the materials you are using. Even the best application technique cannot save low-quality, flimsy plastic nails. This is where investing in premium brands makes a world of difference. For those who are serious about mastering how to apply press on nails and want results that look authentically salon-made, we highly recommend Jolifeu.
Brand Professional Advice: Our experts at Jolifeu advise that for the first 2 to 3 hours after application, you must avoid hot water. No washing dishes, no hot showers, and no swimming. Hot water softens the glue before it has had a chance to fully cure it (which can take up to 24 hours). Additionally, apply high-quality cuticle oil daily around the perimeter of the nails. This keeps the skin hydrated and actually repels water away from the glue seal, extending the life of your manicure.
Why Choose Jolifeu?
Jolifeu is not your average drugstore brand; it is a premium nail artistry experience delivered to your door.
-
100% Reusable: Unlike cheap plastics that bend and crack after one use, Jolifeu nails are built to last. When removed properly with warm soapy water and oil, they can be cleaned and worn multiple times, making them an incredibly eco-friendly and cost-effective choice.
-
Handmade Craftsmanship: Every single Jolifeu set is meticulously handmade by professional nail artists using real salon-grade gel polish. You get the depth, the layering, and the intricate nail art that factory-printed nails simply cannot replicate.
-
Salon-Quality Durability: Because they are made with multiple layers of hard builder gels and premium topcoats, they offer thickness and durability that mirrors an actual acrylic or hard gel extension. They will not bend when you type or chip when you go about your daily life.
-
Customizable on Demand: Everyone's nail beds are different. Jolifeu offers customizable sizing options. You don't have to settle for the standard "one size fits most." You can get a set perfectly tailored to your exact measurements, ensuring an impeccable fit and an even longer-lasting hold.
Conclusion
Achieving a breathtaking, durable manicure at home does not have to be a frustrating game of trial and error. The journey from opening the box to flaunting gorgeous hands comes down to understanding the science of adhesion and respecting the preparation process. By taking the time to properly size your set, thoroughly prep your cuticles, dehydrate the nail plate, and execute the crucial 45-degree angle technique, you are setting yourself up for guaranteed success.
Pairing these expert techniques with high-tier, handmade products like those from Jolifeu elevates your DIY manicure from "obviously fake" to "undeniably luxurious." Remember, patience is key. Treat the process as a relaxing self-care ritual rather than a rushed chore. The next time you have a special event or just want to treat yourself, you will not need to panic or book an expensive appointment. You now hold the blueprint to flawless hands. Keep practicing these steps, and you will quickly see that knowing how to apply press on nails correctly is the ultimate beauty hack that will save you time, protect your natural nails, and keep you looking incredibly stylish all year round.